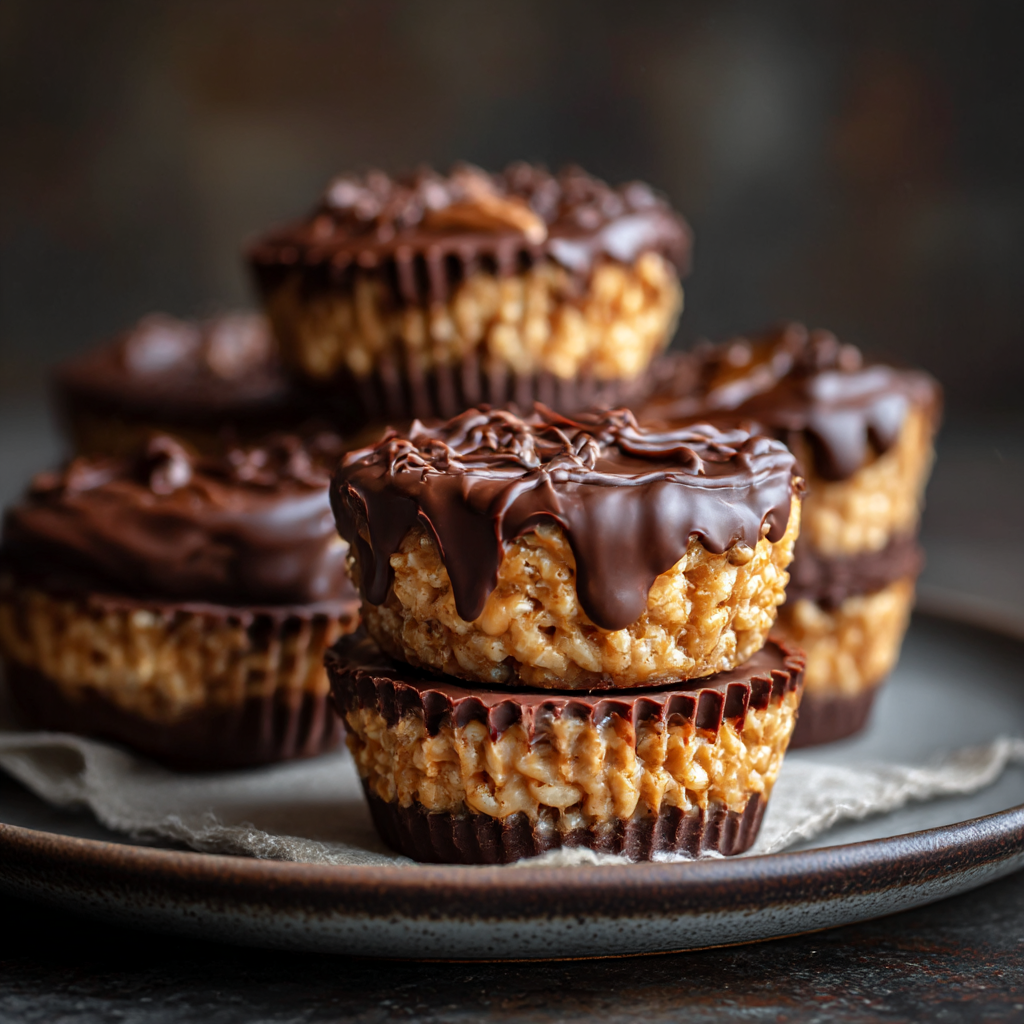
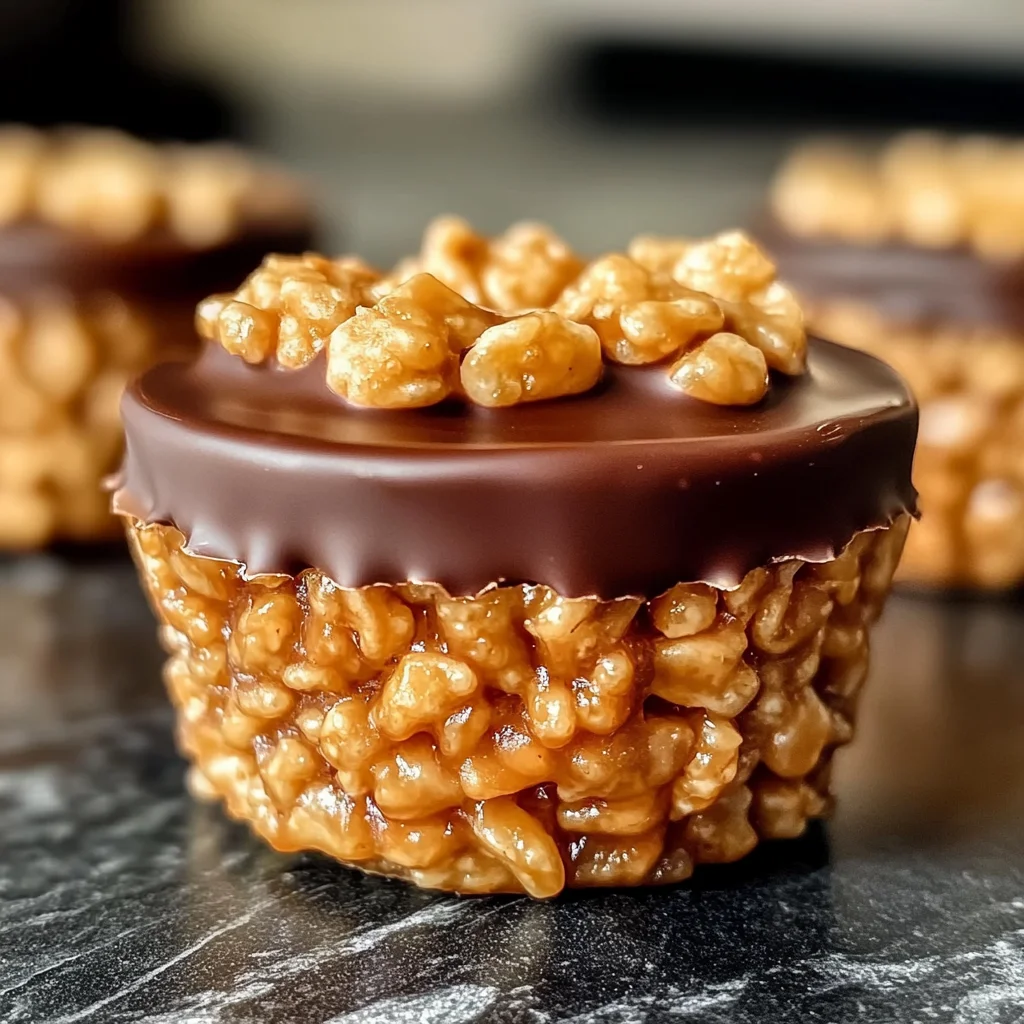
Chocolate Peanut Butter Rice Krispie Cups
Quick, easy, and irresistibly delicious, these no-bake Chocolate Peanut Butter Rice Krispie Cups are the ultimate treat! Perfect for parties, family gatherings, or a sweet pick-me-up, these cups combine creamy peanut butter, rich chocolate, and crispy Rice Krispies into a snack everyone will adore. Their irresistible flavor and delightful texture make them an all-time favorite!
Why You’ll Love This Recipe
- Quick to Prepare: With just 20 minutes of total time, you can whip up these treats in no time.
- No-Bake Delight: Enjoy a delicious dessert without turning on the oven—perfect for warm days!
- Crowd-Pleaser: These cups are sure to impress both kids and adults alike at any gathering.
- Customizable Ingredients: Feel free to adjust the sweetness or add your favorite toppings like nuts or sprinkles.
- Easy Cleanup: Minimal dishes are required, making cleanup a breeze after indulging.
Tools and Preparation
To create your delectable Chocolate Peanut Butter Rice Krispie Cups, you will need some essential tools. Having the right equipment on hand ensures that your treats come out perfectly every time.
Essential Tools and Equipment
- Muffin tin
- Paper liners
- Medium saucepan
- Mixing bowl
- Rubber spatula
- Microwave-safe bowl
Importance of Each Tool
- Muffin tin: This is crucial for shaping your rice krispie cups into perfect servings.
- Rubber spatula: A flexible spatula helps ensure that all ingredients are mixed thoroughly without damaging the cereal.
Ingredients
To make these delightful Chocolate Peanut Butter Rice Krispie Cups, you will need the following ingredients:
For the Base
- 3 cups Rice Krispies cereal
- 1 cup creamy peanut butter
- 1/2 cup unsalted butter
- 1 cup mini vegan marshmallows
For the Topping
- 1 cup chocolate chips
- 1/2 tsp vanilla extract (optional)
- Pinch of sea salt (optional)
How to Make Chocolate Peanut Butter Rice Krispie Cups
Step 1: Melt the Base
In a medium saucepan over low heat, melt unsalted butter and mini vegan marshmallows while stirring consistently until smooth.
Step 2: Add Peanut Butter
Stir in creamy peanut butter and vanilla extract (if using) until fully combined and creamy.
Step 3: Mix with Cereal
Pour the Rice Krispies cereal into a large mixing bowl. Add the peanut butter mixture and gently fold until all the cereal is coated evenly.
Step 4: Shape the Cups
Line a muffin tin with paper liners. Spoon the mixture evenly into each cup and press down gently to form a flat surface.
Step 5: Add Chocolate Layer
Melt chocolate chips in a microwave-safe bowl using 20-second intervals, stirring in between. Spoon melted chocolate over each cup and spread evenly. Sprinkle with sea salt if desired.
Step 6: Set & Serve
Allow the cups to cool at room temperature for 20 minutes or place them in the refrigerator to set faster. Once firm, remove the paper liners and serve!
How to Serve Chocolate Peanut Butter Rice Krispie Cups
These delightful treats can be enjoyed in various ways, making them perfect for any occasion. Whether you’re hosting a party or simply indulging at home, these serving suggestions will elevate your experience.
For Parties
- Arrange the cups on a decorative platter for an eye-catching centerpiece.
- Offer alongside a variety of dips like chocolate or caramel for extra indulgence.
As a Snack
- Pack them in lunchboxes for a quick sweet treat during the day.
- Pair with fresh fruit, like strawberries or bananas, to balance the flavors.
Movie Night Treats
- Serve in individual cups for easy snacking while watching your favorite film.
- Complement with popcorn for a fun and varied snack experience.
Gift Ideas
- Place them in a decorative box as homemade gifts for friends and family.
- Add personalized notes or tags to each box for a thoughtful touch.
How to Perfect Chocolate Peanut Butter Rice Krispie Cups
Perfecting these delicious cups is all about the details. Follow these tips to ensure your treats turn out amazing every time.
- Use Fresh Ingredients: Ensure your peanut butter and chocolate chips are fresh for the best flavor and texture.
- Adjust Sweetness: Feel free to add more marshmallows if you prefer a sweeter treat.
- Control the Melt: Melt chocolate gently using short bursts in the microwave to avoid burning it.
- Gently Fold: When mixing the cereal, fold carefully to prevent crushing the Rice Krispies and maintain their crunchiness.
- Cool Completely: Allow the cups to cool completely before serving; this will help them hold their shape better.
- Experiment with Toppings: Try sprinkling crushed nuts or drizzling melted white chocolate on top for added flavor and texture.
Best Side Dishes for Chocolate Peanut Butter Rice Krispie Cups
These cups pair well with several side dishes, enhancing your dessert experience. Here are some tasty ideas:
- Fresh Fruit Salad – A mix of seasonal fruits offers refreshing contrast to the richness of the cups.
- Yogurt Parfaits – Layer yogurt with granola and berries for a creamy and crunchy side dish that complements the sweetness.
- Vegetable Platter – Crisp veggies like carrots and celery provide a crunchy, healthy option that balances out the dessert.
- Cheese Board – A selection of cheeses can create a savory counterpoint to the sweet treats, perfect for gatherings.
- Ice Cream Sundaes – Pair these cups with scoops of vanilla ice cream topped with chocolate sauce for an indulgent dessert combo.
- Nut Mix – A simple mix of nuts adds crunch and protein, making it an excellent accompaniment to these delightful snacks.
Common Mistakes to Avoid
Avoiding common mistakes will ensure your Chocolate Peanut Butter Rice Krispie Cups turn out perfectly. Here are some pitfalls to watch for:
- Bold Phrase: Not melting the ingredients properly. Ensure you melt the butter and marshmallows over low heat, stirring consistently to achieve a smooth mixture.
- Bold Phrase: Skipping the cooling time. Allowing the cups to cool at room temperature helps them set properly, preventing a gooey mess.
- Bold Phrase: Overfilling the muffin tins. Spoon just enough mixture into each cup and press gently; this prevents overflowing and ensures even shaping.
- Bold Phrase: Using chocolate that doesn’t melt well. Choose high-quality chocolate chips that melt easily for an even layer on top of your cups.
- Bold Phrase: Forgetting to line the muffin tin. Always use paper liners to make it easier to remove your cups after they have set.
Storage & Reheating Instructions
Refrigerator Storage
- Store in an airtight container for up to 1 week.
- Place parchment paper between layers if stacking to prevent sticking.
Freezing Chocolate Peanut Butter Rice Krispie Cups
- Freeze in an airtight container for up to 3 months.
- Use wax paper between layers for better separation.
Reheating Chocolate Peanut Butter Rice Krispie Cups
- Oven: Preheat to 350°F (175°C) and warm for about 5-10 minutes until slightly soft.
- Microwave: Heat on low power for 10-15 seconds, checking frequently.
- Stovetop: Place on a pan over low heat, turning occasionally until warmed.
Frequently Asked Questions
What are Chocolate Peanut Butter Rice Krispie Cups?
Chocolate Peanut Butter Rice Krispie Cups are no-bake treats made with crispy cereal, peanut butter, and chocolate, perfect for satisfying sweet cravings.
How do I store Chocolate Peanut Butter Rice Krispie Cups?
Store them in an airtight container in the refrigerator for up to one week or freeze them for up to three months, using wax paper between layers.
Can I customize my Chocolate Peanut Butter Rice Krispie Cups?
Absolutely! You can add nuts, dried fruits, or swap peanut butter with almond or sunflower seed butter for variety.
How do I make these cups vegan?
Use dairy-free chocolate chips and ensure all ingredients are labeled vegan-friendly.
How long do these cups take to set?
They generally take about 20 minutes at room temperature or can be sped up by placing them in the refrigerator.
Final Thoughts
These Chocolate Peanut Butter Rice Krispie Cups are not only easy and quick but also incredibly delicious! With their delightful combination of flavors and textures, they are perfect for any occasion. Feel free to customize them with your favorite ingredients—experiment with different nut butters or toppings to make them your own!
Chocolate Peanut Butter Rice Krispie Cups

Indulge in the delightful world of no-bake desserts with our Chocolate Peanut Butter Rice Krispie Cups! These irresistible treats combine creamy peanut butter, rich chocolate, and crispy Rice Krispies for a satisfying snack that’s perfect for any occasion.
- Prep Time: 10 minutes
- Cook Time: 10 minutes
- Total Time: 20 minutes
- Yield: Makes approximately 12 cups 1x
- Category: Dessert
- Method: No-Bake
- Cuisine: American
Ingredients
- 3 cups Rice Krispies cereal
- 1 cup creamy peanut butter
- 1/2 cup unsalted butter
- 1 cup mini vegan marshmallows
- 1 cup chocolate chips
Instructions
- In a medium saucepan over low heat, melt the unsalted butter and mini vegan marshmallows until smooth.
- Stir in the creamy peanut butter until well combined.
- Pour the Rice Krispies into a large mixing bowl and gently fold in the peanut butter mixture until evenly coated.
- Line a muffin tin with paper liners and distribute the mixture evenly, pressing down gently.
- Melt chocolate chips in a microwave-safe bowl using short intervals, then spoon over each cup.
- Allow to cool at room temperature for about 20 minutes or refrigerate until set.
Nutrition
- Serving Size: 1 serving
- Calories: 180
- Sugar: 9g
- Sodium: 50mg
- Fat: 10g
- Saturated Fat: 4g
- Unsaturated Fat: 6g
- Trans Fat: 0g
- Carbohydrates: 19g
- Fiber: 1g
- Protein: 3g
- Cholesterol: 15mg