Japanese Katsu Bowls: A Delicious Guide to Making Authentic Katsu at Home
Enjoy a delicious homemade Chicken Katsu served with perfectly seasoned rice and a tangy sauce. This crispy, golden-brown dish is a Japanese favorite that’s sure to impress! Japanese Katsu Bowls: A Delicious Guide to Making Authentic Katsu at Home is perfect for weeknights, special occasions, or any time you crave comfort food. With its satisfying crunch and rich flavors, this dish will become a family favorite in no time.
Why You’ll Love This Recipe
- Quick and Easy: With just a few steps, you can create a delightful meal without hours in the kitchen.
- Crispy Texture: The panko breadcrumbs give the katsu a satisfying crunch that everyone loves.
- Flavorful Sauces: The combination of tonkatsu sauce and other seasonings creates a deliciously tangy finish.
- Versatile Options: Swap chicken with beef or turkey for different variations to suit your taste.
- Perfect for Sharing: Ideal for family dinners or gatherings, this dish is easy to scale up for larger groups.
Tools and Preparation
Gathering the right tools will make your cooking experience smooth and enjoyable. Here are the essential tools you’ll need to prepare your Japanese Katsu Bowls.
Essential Tools and Equipment
- Skillet
- Saucepan
- Mixing bowls
- Meat mallet
- Cooking utensils (spatula, tongs)
- Measuring cups and spoons
Importance of Each Tool
- Skillet: A good skillet allows for even frying, ensuring your katsu gets that perfect golden-brown color.
- Saucepan: Essential for cooking the rice, achieving the right texture is crucial for this dish.
- Meat Mallet: Using a meat mallet helps ensure even cooking by flattening the chicken breasts uniformly.
- Mixing Bowls: You’ll need these for preparing sauces and breading your katsu efficiently.
Ingredients
Enjoy a delicious homemade Chicken Katsu served with perfectly seasoned rice and a tangy sauce. This crispy, golden-brown dish is a Japanese favorite that’s sure to impress!
For the Katsu
- 2 boneless chicken breasts (or beef loin, if preferred)
- Salt and pepper, to taste
- 1 cup all-purpose flour
- 2 large eggs
- 1 cup panko breadcrumbs
- Vegetable oil, for frying
For the Rice
- 2 cups Japanese short-grain rice
- 2 ½ cups water
- 1 tablespoon rice vinegar
- 1 tablespoon sugar
- ½ teaspoon salt
For the Sauce
- ¼ cup tonkatsu sauce (or store-bought if you prefer)
- 1 tablespoon soy sauce
- 1 teaspoon Worcestershire sauce
- 1 teaspoon ketchup
For Garnish
- 1 cup shredded cabbage
- 2 green onions, sliced
- Sesame seeds, for garnish
- Pickled ginger (optional)
How to Make Japanese Katsu Bowls: A Delicious Guide to Making Authentic Katsu at Home
Step 1: Rinse the Rice
Rinse the rice under cold water until the water runs clear. This removes excess starch.
Step 2: Soak the Rice
Transfer the rinsed rice to a saucepan, add water, and soak for 30 minutes. This helps achieve fluffy rice.
Step 3: Cook the Rice
Cover and bring to a boil over medium heat. Reduce heat and simmer for 15 minutes without lifting the lid. Once done, turn off heat and let it sit covered for another 10 minutes.
Step 4: Season the Rice
Mix rice vinegar, sugar, and salt in a small bowl until dissolved. Gently fold this mixture into the cooked rice.
Step 5: Prepare Chicken
Pound chicken breasts to an even thickness of about ½ inch. Season both sides with salt and pepper.
Step 6: Set Up Breading Station
Set up three bowls: one with flour, one with beaten eggs, and one with panko breadcrumbs.
Step 7: Bread the Chicken
Dredge each chicken breast in flour first, dip into eggs next, then coat thoroughly with panko breadcrumbs.
Step 8: Fry Chicken
Heat vegetable oil in a skillet over medium-high heat. Fry chicken pieces for about 4-5 minutes on each side until golden brown and cooked through.
Step 9: Drain Chicken
Once cooked, drain on paper towels to remove excess oil. Let them rest before slicing.
Step 10: Make Sauce Mixture
In a bowl, combine tonkatsu sauce, soy sauce, Worcestershire sauce, and ketchup. Mix well until combined.
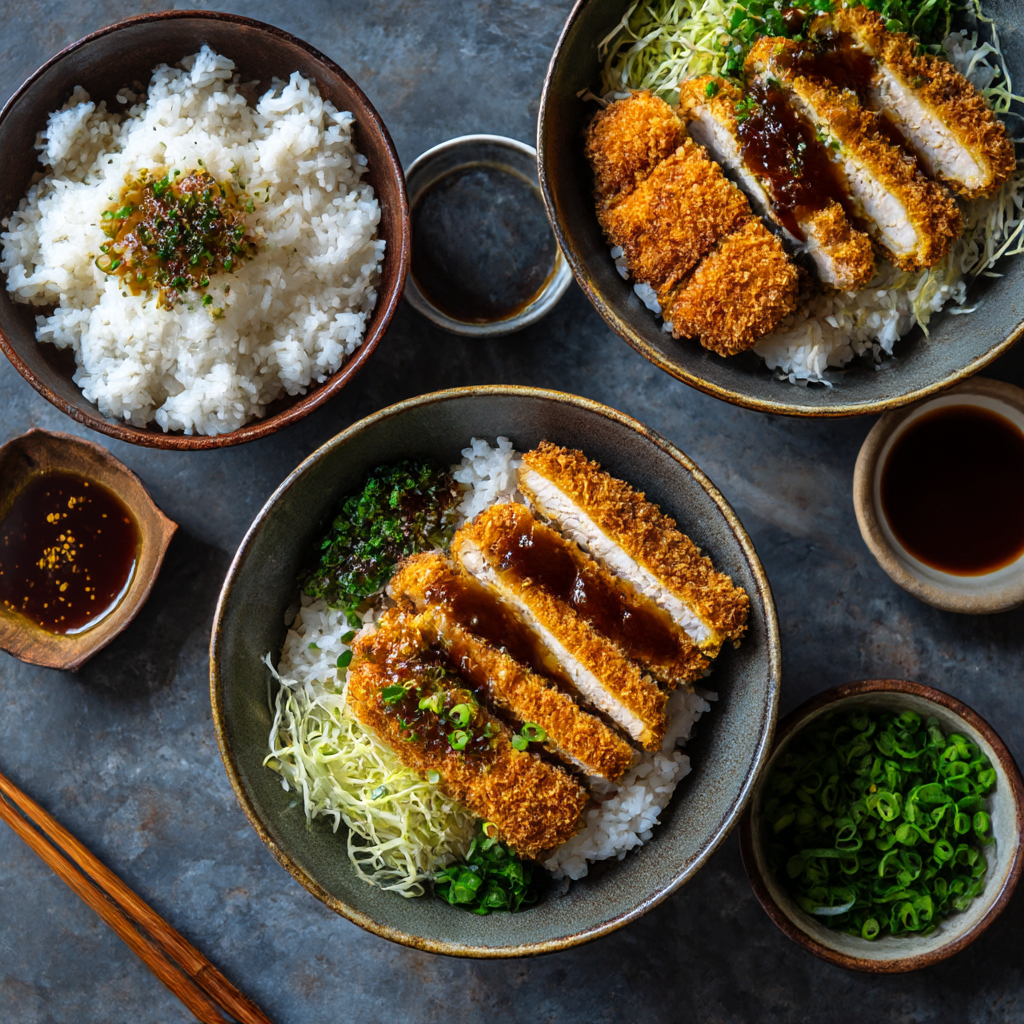
Step 11: Serve Your Dish
On each plate, serve steamed rice topped with sliced katsu. Add shredded cabbage on the side along with sliced green onions and sesame seeds. Drizzle with your prepared sauce. Garnish with pickled ginger if desired.
Now you’re ready to enjoy your homemade Japanese Katsu Bowls!
How to Serve Japanese Katsu Bowls: A Delicious Guide to Making Authentic Katsu at Home
Serving Japanese Katsu Bowls is an art that combines visual appeal with delightful flavors. The presentation can enhance the dining experience, making it a treat for both the eyes and the palate.
Garnish with Fresh Ingredients
- Sliced Green Onions: Sprinkle fresh green onions on top for a pop of color and flavor.
- Sesame Seeds: Toasted sesame seeds add a nutty crunch and elegance to your dish.
- Pickled Ginger: A few slices of pickled ginger provide a tangy contrast, refreshing your palate.
Pair with Traditional Condiments
- Tonkatsu Sauce: Drizzle this sweet and tangy sauce over the katsu for an authentic taste.
- Soy Sauce: Offer soy sauce on the side for those who enjoy an extra salty kick.
- Worcestershire Sauce: A hint of Worcestershire sauce can enhance the umami flavor profile of your meal.
Complement with Colorful Vegetables
- Shredded Cabbage: Lightly dressed shredded cabbage adds crunch and freshness, balancing the richness of the katsu.
- Steamed Broccoli: Bright green broccoli not only looks appealing but also brings additional nutrients to the plate.
How to Perfect Japanese Katsu Bowls: A Delicious Guide to Making Authentic Katsu at Home
Perfecting your Japanese Katsu Bowls is all about technique and attention to detail. Here are some tips to elevate your dish.
- Use Fresh Ingredients: Always choose fresh chicken or beef for better taste and texture.
- Maintain Oil Temperature: Ensure the oil is hot enough before frying; this prevents sogginess and achieves that perfect crispiness.
- Double-Dip for Extra Crunch: For an extra crunchy katsu, dip in egg again after flour and before panko breadcrumbs.
- Rest Before Slicing: Letting the fried katsu rest allows juices to redistribute, keeping it moist when you slice it.
Best Side Dishes for Japanese Katsu Bowls: A Delicious Guide to Making Authentic Katsu at Home
When serving Japanese Katsu Bowls, pairing them with side dishes can create a well-rounded meal. Here are some tasty options:
- Miso Soup: A warm bowl of miso soup is comforting and complements katsu beautifully.
- Edamame: Lightly salted edamame pods offer a healthy snack that’s easy to prepare.
- Japanese Pickles (Tsukemono): These add a refreshing crunch and contrast in flavors alongside your main dish.
- Seaweed Salad: A vibrant seaweed salad provides additional texture and health benefits, enhancing your meal’s nutritional value.
- Steamed Rice Balls (Onigiri): These rice balls serve as a fun finger food option that pairs excellently with katsu.
- Cucumber Salad: A light cucumber salad dressed in rice vinegar offers a crisp, refreshing side that balances out richer flavors.
Common Mistakes to Avoid
Making Japanese Katsu Bowls can be easy, but there are common mistakes that can ruin your dish. Here are some tips to help you avoid them.
- Not seasoning the chicken: Always season your chicken breasts with salt and pepper before breading to enhance flavor. A little seasoning goes a long way in making your katsu delicious.
- Skipping the soaking step for rice: Soaking the rice helps remove excess starch and improves texture. Don’t skip this step; soak for at least 30 minutes for the best results.
- Using too much oil for frying: Using excessive oil can make the katsu greasy. Aim for just enough oil to cover the bottom of your skillet for a crispy finish without being oily.
- Overcrowding the pan: Frying too many pieces at once lowers the oil temperature, resulting in soggy katsu. Fry in batches to ensure even cooking and crispiness.
- Ignoring resting time after frying: Allowing the katsu to rest on paper towels is crucial. This step lets excess oil drain and helps maintain crispiness before slicing.
- Neglecting sauce balance: The sauce is key to a great katsu bowl. Adjust ingredients like soy sauce and ketchup to get your preferred flavor balance.

Storage & Reheating Instructions
Refrigerator Storage
- Store leftover katsu in an airtight container for up to 3 days.
- Keep rice in a separate container to maintain its texture.
Freezing Japanese Katsu Bowls: A Delicious Guide to Making Authentic Katsu at Home
- Freeze cooked katsu by wrapping it tightly in plastic wrap or foil, then place it in a freezer bag for up to 2 months.
- Rice can also be frozen in individual portions for convenience.
Reheating Japanese Katsu Bowls: A Delicious Guide to Making Authentic Katsu at Home
- Oven: Preheat your oven to 375°F (190°C). Place katsu on a baking sheet and heat for about 10-15 minutes until warm and crispy.
- Microwave: Heat in short bursts of 30 seconds, checking frequently. This method may not keep it crispy but is quick.
- Stovetop: Heat a skillet over medium heat with a little oil. Add katsu and heat for about 5 minutes on each side until warmed through.
Frequently Asked Questions
Here are some common questions about making Japanese Katsu Bowls.
What is the best meat for Japanese Katsu Bowls?
Chicken breast is traditional, but beef loin or turkey works well too. Choose your favorite protein!
How do I make gluten-free Japanese Katsu Bowls?
Substitute all-purpose flour with a gluten-free flour blend and use gluten-free panko breadcrumbs.
Can I make Japanese Katsu Bowls vegetarian?
Yes! Use eggplant or tofu slices instead of meat, following the same breading procedure for a delicious vegetarian option.
Are Japanese Katsu Bowls customizable?
Absolutely! You can add vegetables like carrots or mushrooms, or modify sauces based on your taste preferences.
How do I store leftovers from Japanese Katsu Bowls?
Store leftovers separately in airtight containers in the refrigerator or freezer as mentioned above.
How does this recipe compare with other Asian dishes?
Japanese Katsu offers a unique combination of crunch from panko and savory flavor from tonkatsu sauce, setting it apart from other Asian fried dishes.
Final Thoughts
Japanese Katsu Bowls are not only delicious but also incredibly versatile. You can customize this dish by choosing different proteins or adding fresh veggies. Try making it at home – it’s easier than you think!
Japanese Katsu Bowls
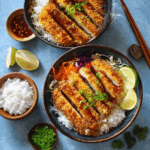
Indulge in the crispy, savory delight of homemade Japanese Katsu Bowls, a dish that brings the flavors of Japan right to your table. This recipe features perfectly breaded and fried chicken or beef, served alongside seasoned rice and garnished with fresh vegetables. With a satisfying crunch from panko breadcrumbs and a tangy sauce that ties it all together, this dish is perfect for weeknight dinners or special occasions. Easy to prepare and customize, Japanese Katsu Bowls will quickly become a beloved family favorite.
- Prep Time: 30 minutes
- Cook Time: 20 minutes
- Total Time: 50 minutes
- Yield: Serves 4
- Category: Main
- Method: Frying
- Cuisine: Japanese
Ingredients
- 2 boneless chicken breasts (or beef loin)
- 1 cup all-purpose flour
- 2 large eggs
- 1 cup panko breadcrumbs
- Vegetable oil for frying
- 2 cups Japanese short-grain rice
- ¼ cup tonkatsu sauce
- 1 tablespoon soy sauce
- 1 tablespoon rice vinegar
- 1 tablespoon sugar
- ½ teaspoon salt
- 1 cup shredded cabbage
- 2 green onions, sliced
- Sesame seeds for garnish
Instructions
- Rinse rice under cold water until clear; soak for 30 minutes in a saucepan covered with water.
- Cook soaked rice on medium heat until boiling; cover and simmer for 15 minutes. Let sit for 10 minutes.
- Pound chicken to even thickness; season with salt and pepper.
- Set up three bowls: one with flour, one with beaten eggs, and one with panko breadcrumbs.
- Dredge chicken in flour, dip in egg, then coat with panko.
- Heat oil in a skillet over medium-high heat; fry chicken for 4-5 minutes per side until golden brown.
- Drain on paper towels before slicing.
- Serve sliced katsu over rice, garnished with shredded cabbage, green onions, and drizzled with tonkatsu sauce.
Nutrition
- Serving Size: 1 bowl (300g)
- Calories: 570
- Sugar: 5g
- Sodium: 800mg
- Fat: 25g
- Saturated Fat: 4g
- Unsaturated Fat: 18g
- Trans Fat: 0g
- Carbohydrates: 66g
- Fiber: 2g
- Protein: 28g
- Cholesterol: 150mg